InfraWare 360 allows for document approval using eSign-off. To create this requirement 3 things must be considered:
The author signature or desired text needs to be added to the author settings
The eSign insertion needs to be added to the template of each affected document type
The workflow must be adjusted to stop on eSign for approval before delivery
If one of these steps is omitted, eSign may not work as you intend.
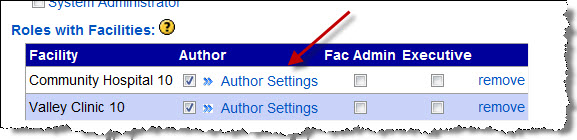
1) Document Notation/Signature
The document notation/signature needs to be added to "Author Settings" for each facility attached to the author
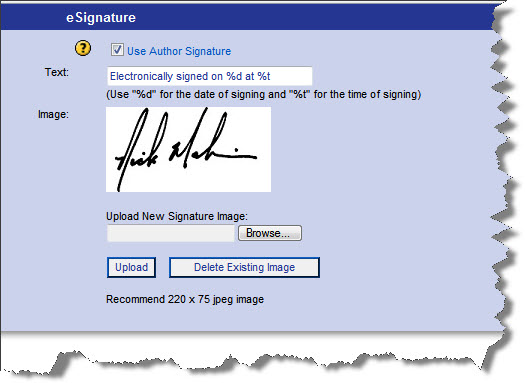
Click the "Use Author Signature" box at the top of the "eSignature" section. You must check this option in order for the Author's profile to retain the designated text and uploaded image.
Text and/or Image: Add text to be added to the document after eSigning takes place. Please Note - In order for the Enable checkbox to stay checked, a signature text line or a signature image will need to be set up.
Text: You may add a text version of document approval that notes the date and time (ie. Document approved %d at %t by dictator).
Image: You may upload a 220 x 75 .jpg image of the author's signature. Browse to locate the file and then click on Upload.
Save changes
2) Template Creation/Document Type
Most Admins prefer to adjust the templates of any document type that will be used for eSign-off
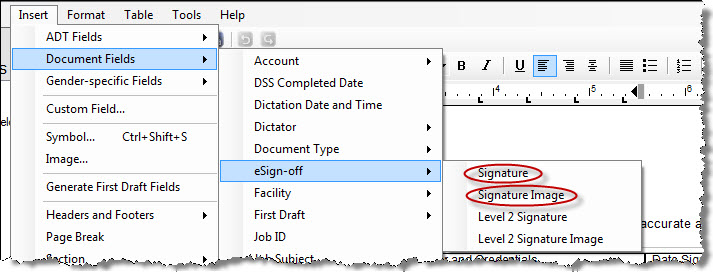
Using the InfraWare Template Editor (ITE), open each template from the InfraWare Platform
You will be prompted to login using your administrator credentials
Load the desired template and put the cursor on the desired spot for the notation/signature
Note: the ITC allows MTs to insert Esign fields if they are not on the templates
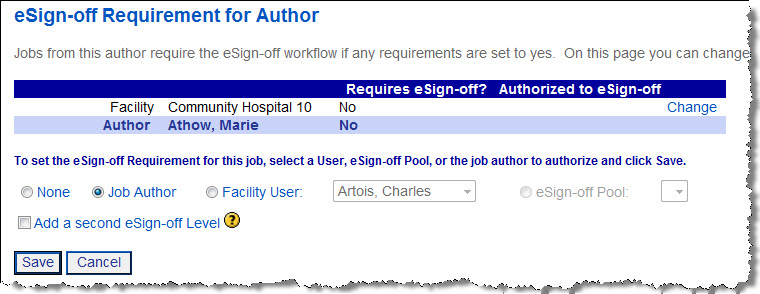
3) Workflow eSign-off Management
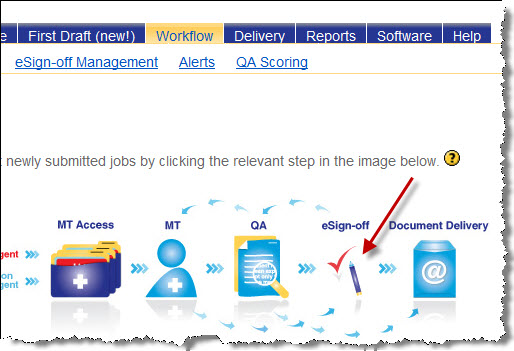
The workflow needs to be adjusted to require the job to be approved prior to delivery
On the Workflow Tab select the eSign-off icon
Select "Manage" for the appropriate eSign requirement. You may want to create eSign pools, set the requirement for the entire facility, or make it author specific.
When you set the requirement, you must also identify the person or group responsible to approve the reports. This may or may not be the job author.
Sometimes eSign is used for document approval only and not to add a legal signature to a document. In that case, Omit steps 1 & 2 and only set up workflow step 3.
For step 1 above - If you are adding a signature image and/or text you must check the "Use Author Signature" check box in order for the Author's profile to retain the designated text and uploaded image.
Here is a short video that describes the eSign feature: