| Answer / Solution |
 |

First Draft Areas Explained
Overview
A First Draft Area is a First Draft field which can be added to a template to accommodate one or more headings and subheadings. Using First Draft Areas gives you the flexibility to control multiple formatting options for each heading/subheading as well as multiple other options explained below.
Requirements
- ITE Beta version 7.x or later is required. This feature is currently only available in the ITE Beta release.
- An Account level Administrator login ID and password (or Facility Admin with permission to use ITE - KB554)
- Production workforce using the latest InfraWare Transcription Client (ITC) version 7.x or greater.
Steps
- Open the ITE Beta v7.x or later.
- Place your cursor at the position on the document where you would like to insert the First Draft Area.
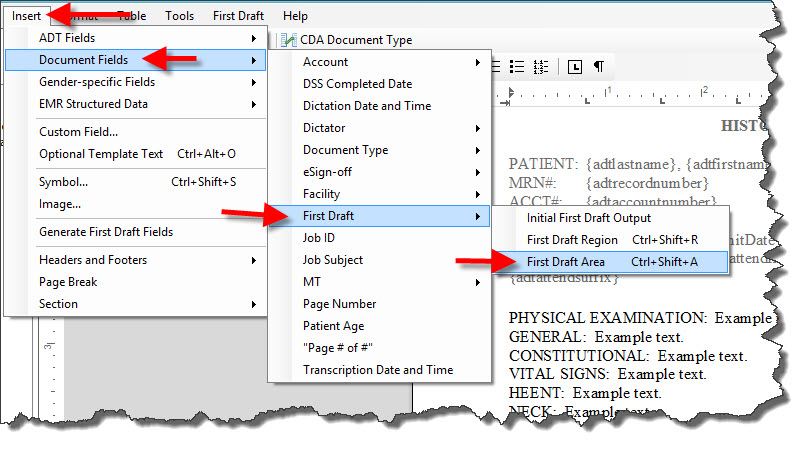
- Use Keyboard Shortcut Ctrl + Shift + A or go to Insert ⇒ Document Fields ⇒ First Draft ⇒ First Draft Area:
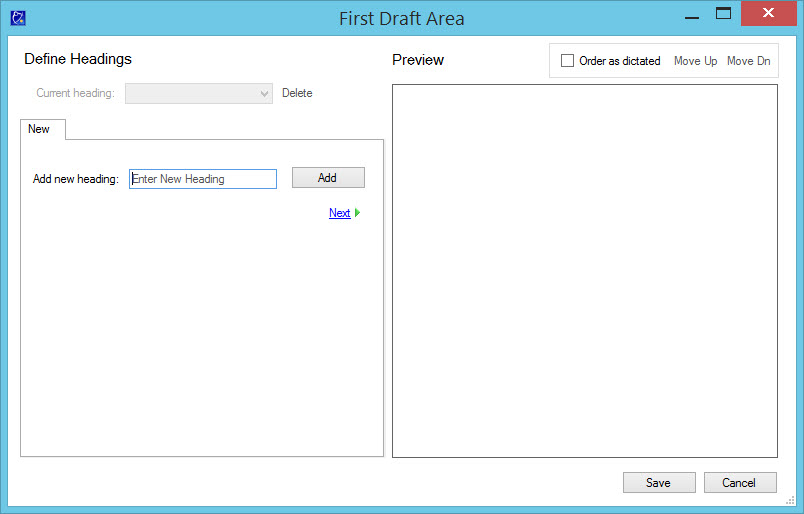
- Add New Heading: Enter the text of the new heading and click Add. You may repeat these steps to add multiple headings.
- Heading Format: Click Next or go to the Heading Format tab to set up formatting for the heading. Changes will be reflected in the Preview area on the right side of the window, so you can see how the draft output will be formatted with the chosen settings.

- Current Heading: At the top of the window choose from the drop-down menu to select a specific heading.
- Heading Text: To change the text of the heading type into the text box and click the Change Heading Text link.
- Formatting: Choose the font, font size, and whether the heading should be bold, italics, underlined.
- Uppercase: Check the box if the heading should be all UPPERCASE.
- Colon: Check the box if the heading should be followed by a colon.
- Display Heading even if it is not detected by First Draft: Check the box if the heading should be displayed even if it is not detected by First Draft as a spoken heading. If this box is checked the selected heading will always be on the draft which is presented to the MT for FD jobs.
- Display Heading in non-FD jobs: Check the box if the heading should be displayed in non-FD jobs. If this box is checked the selected heading will always be on the draft which is presented to the MT for non-FD jobs (straight transcription).
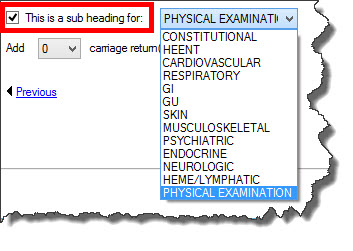
- This is a sub heading for: If there is more than one heading in the First Draft Area the option to nest the selected heading as a subheading under a specific heading will be enabled. Select from the drop-down menu of headings. You can use this option for subheadings in a physical examination, review of systems, etc. If only one heading is present in the First Draft Areas this option will be grayed out.
- Add ____ Carriage Returns before the heading: Choose from the drop-down menu to set the number of carriage returns before the heading.

- Added Heading is Optional Template Text: By default, all headings added within a First Draft Area are considered to be Optional Template Text. This setting allows you to deselect the option for a specific heading if needed. See KB599 for details on how Optional Template Text works.

- Note: The status of this option (checked versus unchecked) will be carried forward when new headings/subheadings are added within the same First Draft Area, according to the heading in focus at the time the new heading is created.
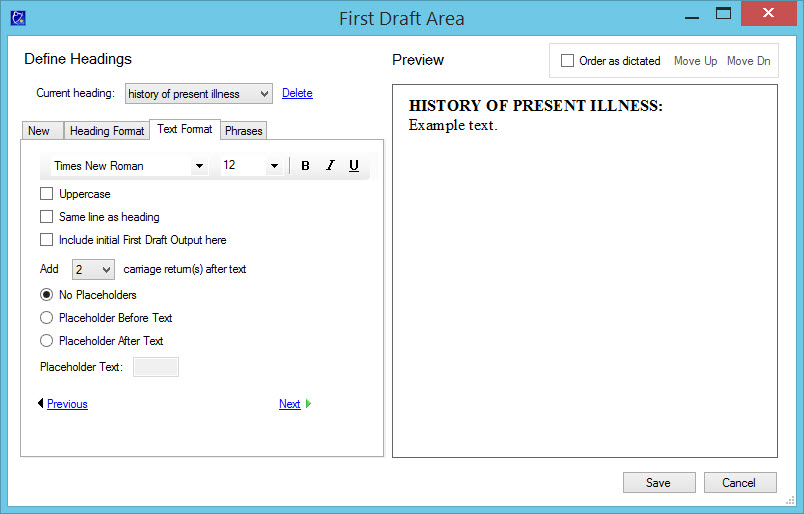
- Text Format: Click Next or go to the Text Format tab to set up formatting for the text after the heading:
- Formatting: Choose the font, font size, and whether the heading should be bold, italics, underlined.
- Uppercase: Check the box if the heading should be all UPPERCASE.
- Same line as heading: Check the box if you would like the text of the selected heading/subheading to be on the same line as the heading/subheading.
- Include Initial First Draft Output here: Check this box if you would lik the Initial First Draft field to be placed after this heading. The Initial First Draft Output field (which appears on the template as {FirstDraftField} for brevity), is where all of the recognized text will be output before the first heading is detected. See KB547 for more details on this feature.
- Add ____ carriage return(s) after text: Choose from the drop-down menu to set the number of carriage returns after the text.
- Placeholder Options: See KB94 for details on the Placeholder(s) feature.
- No Placeholders: Uncheck the box if you would like to include placeholders for the selected heading/text. This is checked by default.
- Placeholder Before Text: Check this box if you would like the placeholder to appear BEFORE the draft output text for this heading.
- Placeholder After Text: Check this box if you would like the placeholder to appear AFTER the draft output text for this heading.
- Placeholder Text: Select a unique string of text to be used to identify the places to which you want to navigate, such as @#$ or @@. Keep this consistent across all of your templates and make sure Transcriptionists are aware so they can set the appropriate Placeholder in ITC.
- Phrases: Click Next or go to the Phrases tab to set up phrases for the selected heading. See KB757 for details on First Draft Phrases.
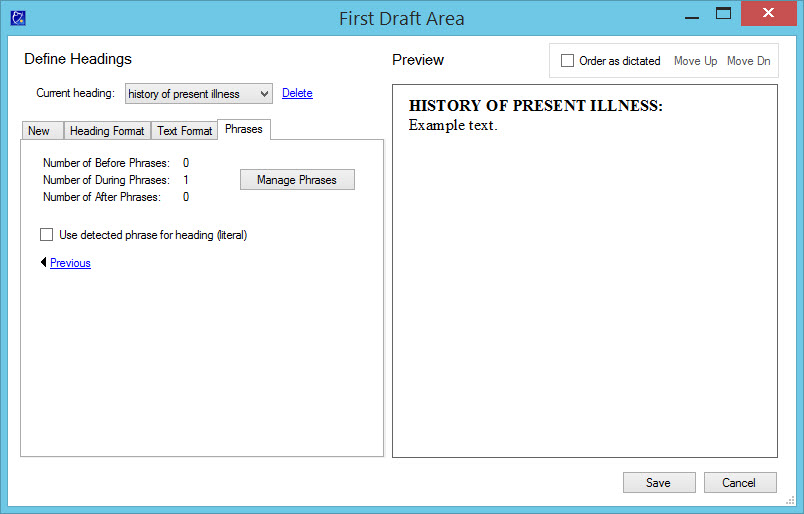
- Phrase Summary: Phrases can be set up as Before, During, and After. On the Phrases tab the count of phrases currently set up as Before, During, and After options are displayed. In the screenshot above, there is only one phrase set up, which is "During." By default, the name of the heading is automatically included as a phrase which is set up as During the heading.
- Use detected phrase for heading (literal): Check this box if you want the phrase dictated and recognized for this heading should be the heading, rather than the name of the heading. This gives you the option to choose if the headings should be literal or not. For example: If the heading is "History of Present Illness" and the recognized phrase is "HPI" the draft output would generate "HPI" as the heading.
- NOTE: If this box is checked and you have extra words in the phrases for a heading those extra words would be included in the literal heading. For example, if the recognized phrase to trigger this heading is "period HPI the patient", then "period HPI the patient" would be the heading in the draft output presented to the MT. If literal headings are desired be sure to not include extra words in the phrases for headings.
- Administration: Click Next or go to the Administration tab to Merge or Move headings or Split an Area. In this tab you can Merge, Move and Split headings/subheadings and First Draft Areas. Please refer to KB888 for more details.

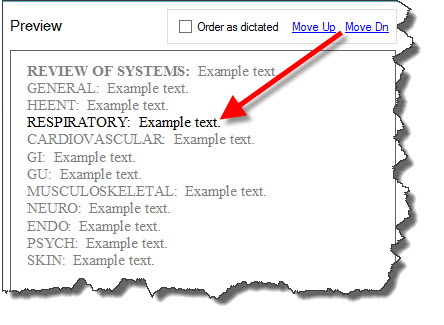
- Order of Headings: Set the order of the headings included in the First Draft Areas. Options Include:
- Order as Dictated:
- If this box is checked headings will be in the order they are dictated by the author.
- If the box is unchecked the headings will appear in the draft output in the order shown in the Preview section.
.jpg)
- Move Up & Move Down: Moves the selected heading/subheading up or down in the order. In the example below "RESPIRATORY" is selected, so that heading would be moved up or down the list.
Notes:
- Once a template contains First Draft Areas do not modify the template using an older version of the ITE and upload to the InfraWare platform. This will cause the First Draft areas to not be recognized properly because the older version of the ITE does not recognize FD Areas.
- There can be multiple First Draft Areas on a template.
- First Draft Areas and First Draft Regions can both be used on the same template.
|
