KB186 Print this KB      
How does the Quick Type feature work?

Answer / Solution

Quick Type Word Expander

Overview

Quick Type is one of the word expander options built-in to the InfraWare Transcription Client (ITC). Once an entry is added to Quick Type the characters will expand automatically when you press the spacebar/return/punctuation keys/hyphen/closing parenthesis/tab.  Quick Type shortcuts can end with punctuation marks (e.g., "qt;"). *Note* Putting punctuation marks inside of the shortcut is not supported, however.  The ITC will attempt to look at the previous two words when evaluating Quick Type shortcuts.  Preference will be given to matching the last word, but if no match is found for the last word, the combination of the last two words will be considered.

Quick Type is an optional feature and can be turned off or on using the checkbox at the top of that screen.  The only good reason to turn off the feature is when a third-party word expander is used.  Most any "Windows word expanders" will work with the ITC, but it isn't recommended to use Quick Type at the same time as another expander.


Solution

The InfraWare Transcription Client (ITC) allows you to customize your Quick-Type preferences for an enhanced, user-friendly, experience.   This feature saves you time and keystrokes by filling in words for you based on pre-set parameters.

You can access this feature from both the Main Window, and the ITC Editor window.

Tasks

From the ITC Editor, this feature can be accessed from the Tools menu Options User Settings.

  • Click the Quick Type tab.
  • Or by using the keyboard shortcut Alt + Shift + F3
  • Or by using the Insert > Quick Text menu, this feature can be accessed by using the keyboard shortcut Ctrl + Shift + F3.

From the ITC Main Window this feature can be accessed from the Actions menu Settings User Settings

  • Click the Edit Settings,
  • Or by pressing the keyboard shortcut F10

There are three ways to add entries:

 
1.    Manually add Quick Type entries.
2.    Retrieve from Word:  If you have used the Autocorrect feature in Microsoft Word on the same computer as the ITC, the ITC can attempt to retrieve that list directly from Word.
3.    Retrieve from File:  This is helpful for both backup/restore as well as sharing expansions with others.

1) Manually:

  • Tab twice to the Replace cell:  Enter the text in this field you wish to type in order to expand this entry (example: aaa).
  • Tab to the With cell:  Enter the text in this field which will be the expanded word(s) (example: abdominal aortic aneurysm).
  • Click Add; or Tab down to Add button then hit Enter (your cursor will then be back up in the Replace cell.)
  • You can add as many entries as you wish by following these steps.

2) To Retrieve a file from Word in the ITC:

  • Click Retrieve from File/MS Word.
  • Choose the option Retrieve from Word.
  • Select Retrieve, (if you wish to replace data previously programed in Quick Type with the newly created file, click in the box next to Overwrite Current Quick Type Entries), and then click Retrieve. 
  • Your entries will populate.

3) To Retrieve a CSV file in the ITC:

  • Click Retrieve from File/MS Word.
  • Choose the option to Restore from a CSV file, (if you wish to replace data previously programed in Quick Type with the newly created file click in the box next to Overwrite Current Quick Type Entries), and then click Retrieve. 
  • Browse to locate the file you created with Excel and select it, or click on Open.
  • A message of "Restore Successful" will display.
  • Click OK.
  • Your entries will populate.

Save to file: In addition, you can Save your expander file by clicking on Save to File.  Even though ITC user settings are automatically backed up to the InfraWare servers it is recommended that you back up this file. When you back-up the Quick Type word expander list with the ITC it saves a qtb file that can be retrieved (from this screen).  It is helpful for both backup/restore as well as sharing functionality.

  • To export click on Save to File and then browse to the location where you wish to store the file (My Documents, external drive, etc.).
  • Type a File Name and click Save.
  • A message of Success will display.
  • Click OK.

Export:  You can export your expander file to SpeedType (third party software) by following the steps above under Save to file, but in addition to typing a File Name, you will also want also select SpeedType Backup (*.stb) from the dropdown box next to Save as type.

Excel/CSV - If you have a list in some other format that you would like to import to the ITC, simply put that list in Microsoft Excel.

  • Put the shortcut in column A and the extended version in column B, as shown in this example.


  • Save:  After keying or pasting your list, save as a CSV file. 
  • Click Save As on the File menu.
  • Select the location where you wish to store the file.
  • Type a File Name
  • Click the down arrow next to the Save as type cell, scroll down to select Comma-delimited (CSV) as the file type.

Please Note: If Excel prompts you about formatting concerns, choose to proceed.  Your experience may differ depending the version of Excel you are using.

Replace:  It is sometimes necessary to modify an existing entry. 

  • When an existing entry is selected the Add button will become Replace, but will be grayed out until a change is made.
  • Select the entry you wish to modify.  
  • Make the desired change to the Replace and/or With fields.
  • Once any change is made the Replace button will become active and is no longer grayed out.
  • Click Replace.

Delete:  You can delete a single entry or all entries.

  • To delete a single entry select that entry from the list and click Delete.  There is no confirmation prompt, so please make sure you have selected the correct entry to be deleted.
  • To Delete ALL Quick Type entries click the Delete All button.  You will be prompted to confirm this choice. 

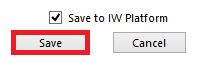
Please Note: This process cannot be undone once you have selected the Save option listed at bottom of the screen.

Back Up/Save:  At the bottom of the screen notice the Save to IW setting. All user settings are automatically saved on the IW Platform when you click Save. The user settings are stored on the InfraWare Platform, and can be imported when you install the ITC software on a different computer.

  • Click the Save button.

Note:

  • The Replace entry may include a maximum of 2 words.  The ITC will now attempt to look at the previous two words when evaluating Quick Type shortcuts.  Preference will be given to matching the last word, but if no match is found for the last word, the combination of the last two words will be considered.  For example if you had two shortcuts: "my em" and "em" and then typed "my em" followed by a space, the ITC would expand the "em" Quick Type and not the "my em" entry. The primary example for this request is adding "doe snot" to expand to "does not".  Each entry will need to be added to QuickType. 
  • Ctrl + Alt + Space - This shortcut was added to prevent the ITC from expanding a Quick Type entries on demand (if you do not want them to expand).
  • Quick Type shortcuts can now end with punctuation marks (e.g., "qt;").  NOTE:  Putting punctuation marks inside of the shortcut is not supported, however.

Videos:  The Video Index below will allow you to click on any of the topic links and jump straight to that point in the video, or you can choose to view the entire video which is embedded below the index.


Related KBs
How do I Add Quick-Type (word expander) Shortcuts in the ITC?
User Settings: Quick-Type tab
How do I Modify Quick-Type (word expander) Settings?
Modify Quick-type/Word Expander Settings
How to import and export word expander lists
How to import and export word expander lists into Quick-Type & Quick-Text
How does the Quick Text feature work?
Quick Text explained

Direct Link to This KB
https://www.infraware.com/KB/?f=186

Last Updated
Thursday, December 2, 2021

Tags
quick type macro shortcut text expander KB186 quicktype quick-type
How would you rate this article?

Poor
1
2
3
4
5

Great
Submit

Back to Top